How to Add Molding to Kitchen Cabinets
A budget friendly way to update your kitchen is to enclose space above kitchen cabinets!
Our builder grade, kitchen cabinets were in need of a makeover. Instead of just painting them, we extended the cabinets to the ceiling.
This project cost us less than $60 and I think it made a significant difference in making the kitchen more custom looking!
And I love that there is no more dust collecting in the empty space that was above the cabinets!
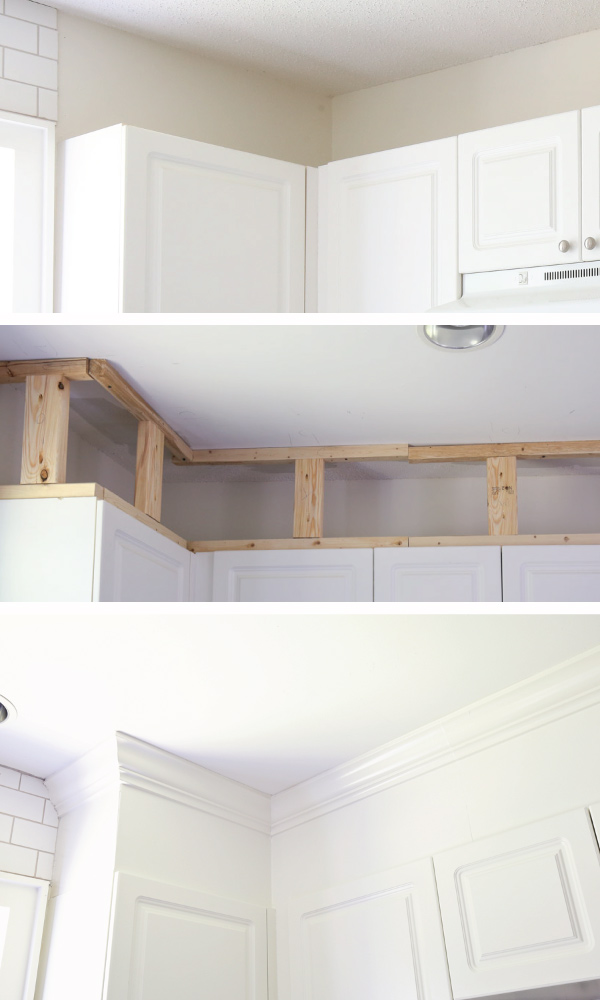
BEFORE PHOTO:
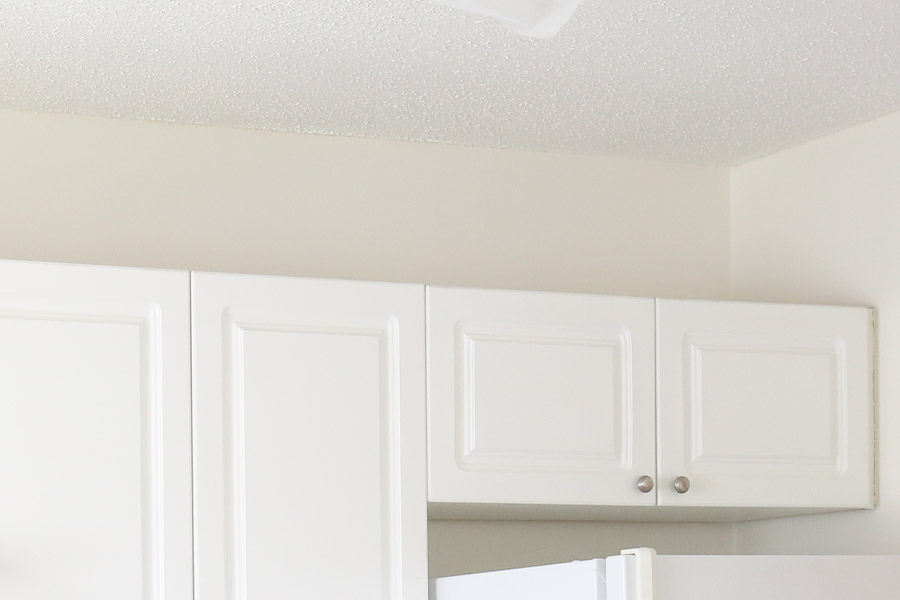
BEFORE PHOTO
We also scraped our popcorn ceiling and painted it, which didn't cost us anything except the cost of the ceiling paint, and it improved the final look as well!
Note, this post contains some affiliate links. For more info see my disclosures here.
How to enclose space above kitchen cabinets:
** Note, the amount of boards you will need depends on the measurement of your wall(s).
Video Tutorial:
Subscribe to my YouTube Channel here!
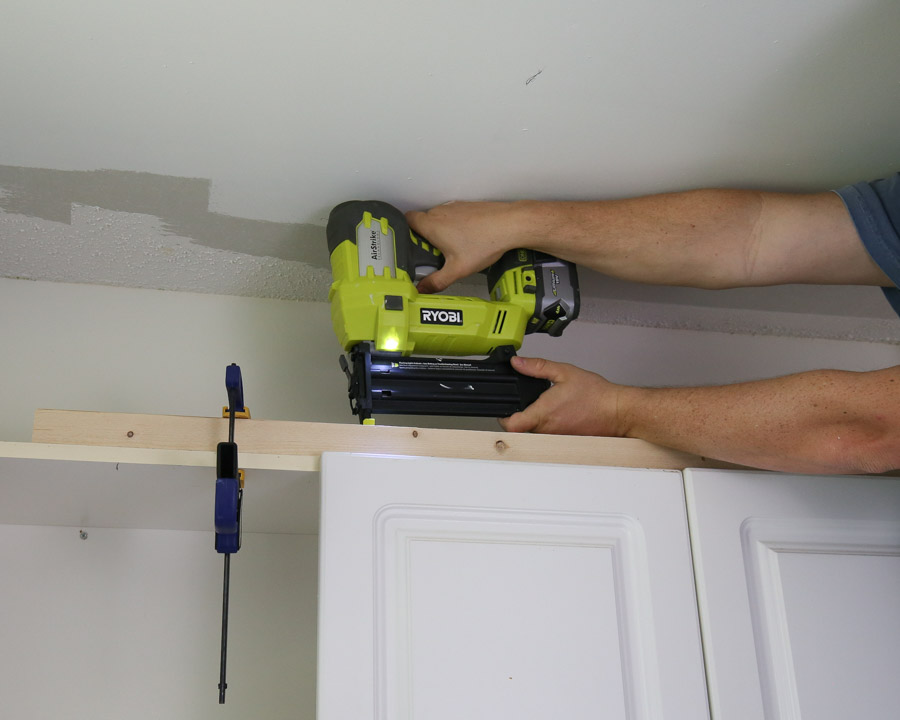
1. Add 2×2 boards to top of cabinets and ceiling
Add a 2×2 board to the top of your cabinets with 2″ brad nails and a brad nailer. Make sure to attach them 1/4″ back from the front edge of the cabinet. We held a scrap piece of 1/4″ plywood in front of the 2×2 to line it up correctly when we clamped the 2×2 down.
Use a stud finder and mark where the studs are on the ceiling above the cabinets. Then, attach a 2×2 with screws into the ceiling studs above the bottom 2×2.
In order to attach our ceiling 2×2 in the correct spot so that is was aligned with the bottom 2×2, we held a scrap piece of wood up against the bottom board with a square and marked where it hit the ceiling. I'm sure there are better ways to do this, but this way worked for us!

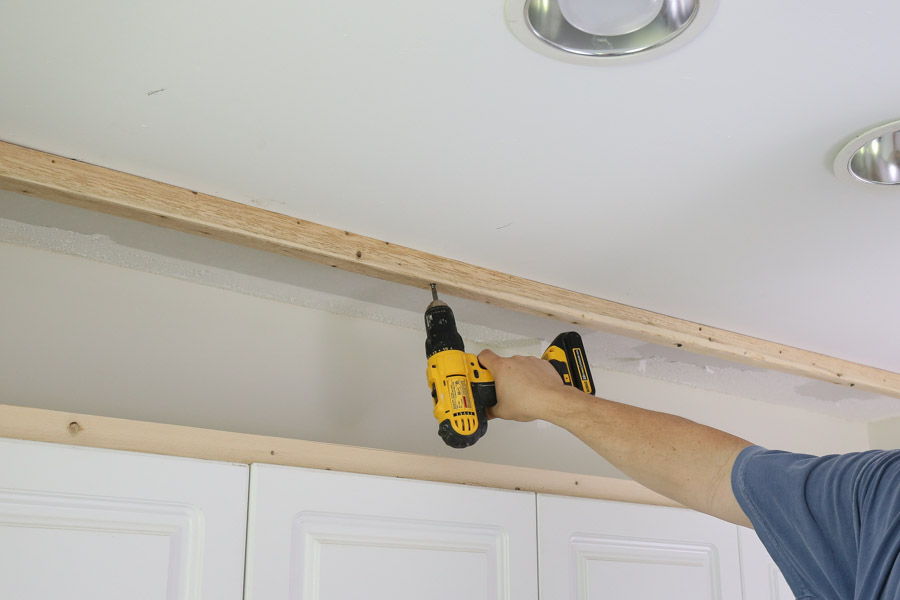
Continue this step until you have a finished adding the 2×2 boards along all of the cabinet tops and ceiling. Cut any 2×2 boards to size with a miter saw where needed.
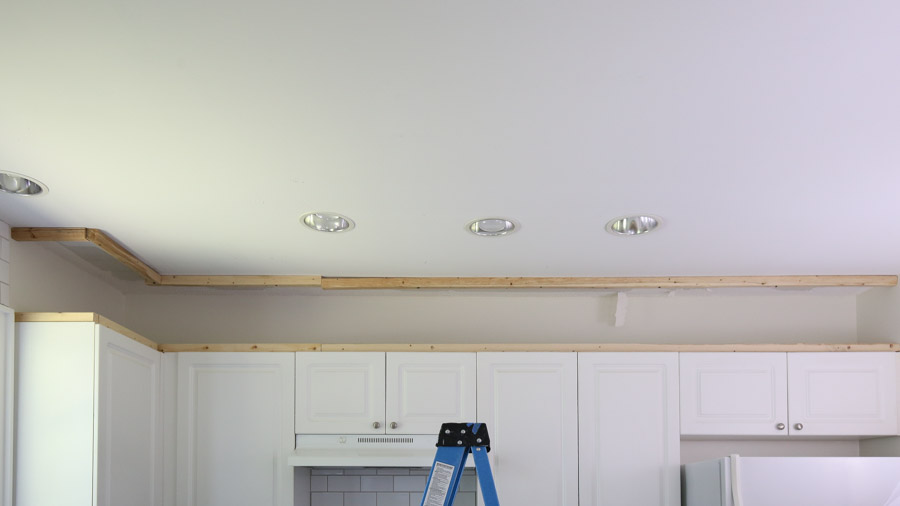
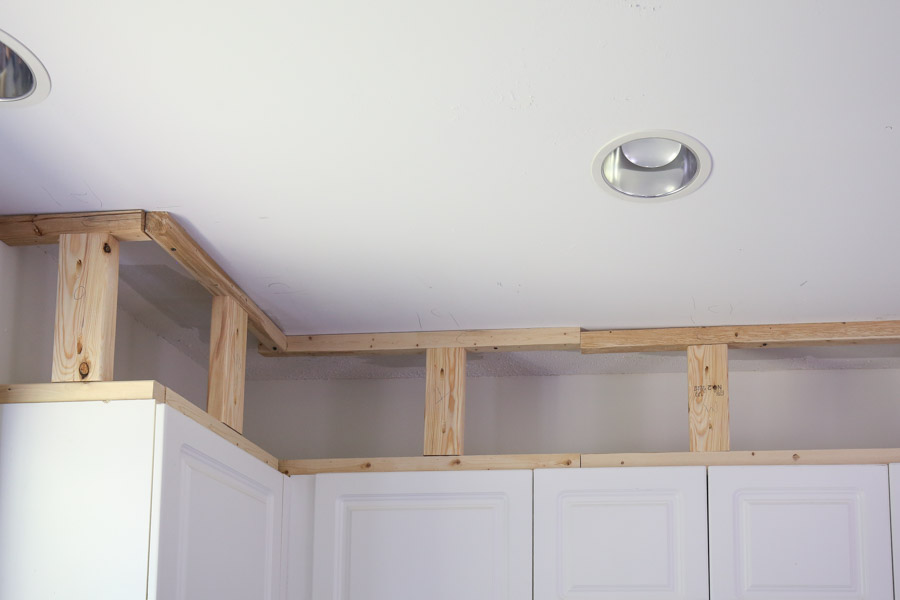
2. Add 2×4 wood blocks spaced out between the 2×2 boards
If you are planning on adding crown molding like we did, then 2×4 blocks need to be added so that the crown has wood to nail through and secure to the "wall".
Most ceilings aren't perfectly level, so measure what the exact distance is between the two 2x2s at a few different spots and mark those spots on the wall. We spaced our boards about 18″ apart. Then, cut 2×4 boards to those sizes using a miter saw.
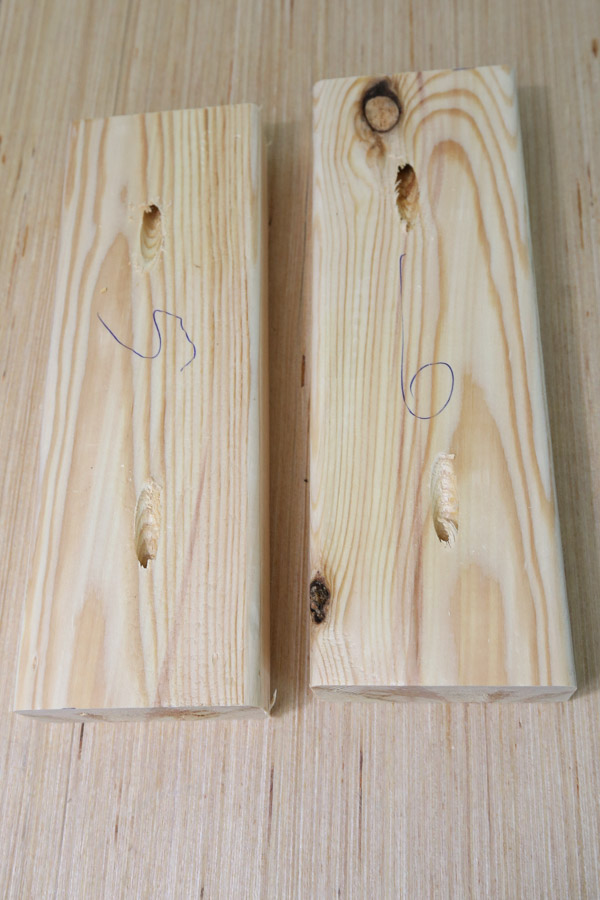
Add a pocket hole to each side of the 2×4 boards with a Kreg Jig. Also, it helped to number each board to remember exactly where it should go between the 2x2s.
Attach the 2x4s to the 2x2s with 2 1/2″ Kreg screws. Note, the 2x4s don't have to be screwed in really tight since you don't want them pulling on the 2x2s. You just want them tight enough to be secure. Make sure to mark on the ceiling where these 2x4s are located so you can nail the crown molding into them.
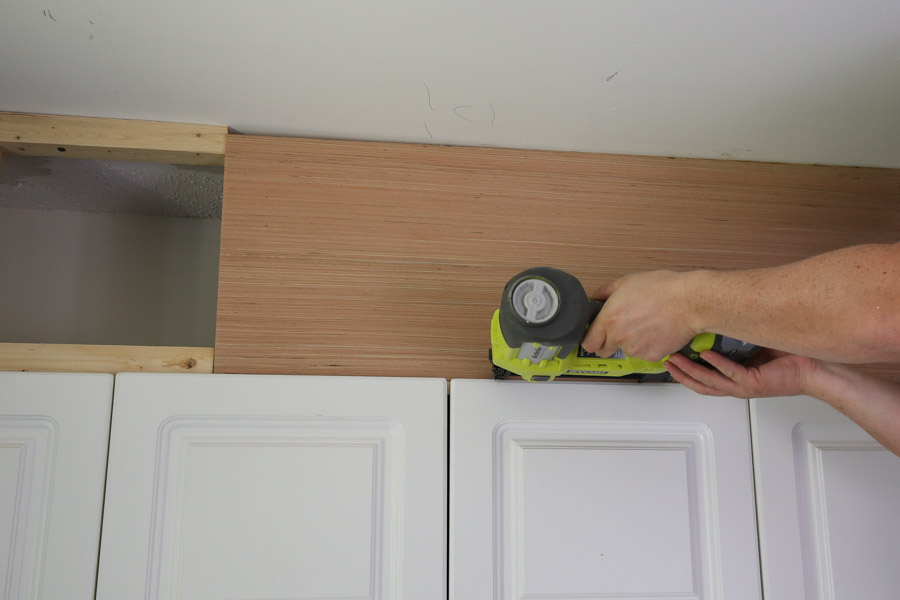
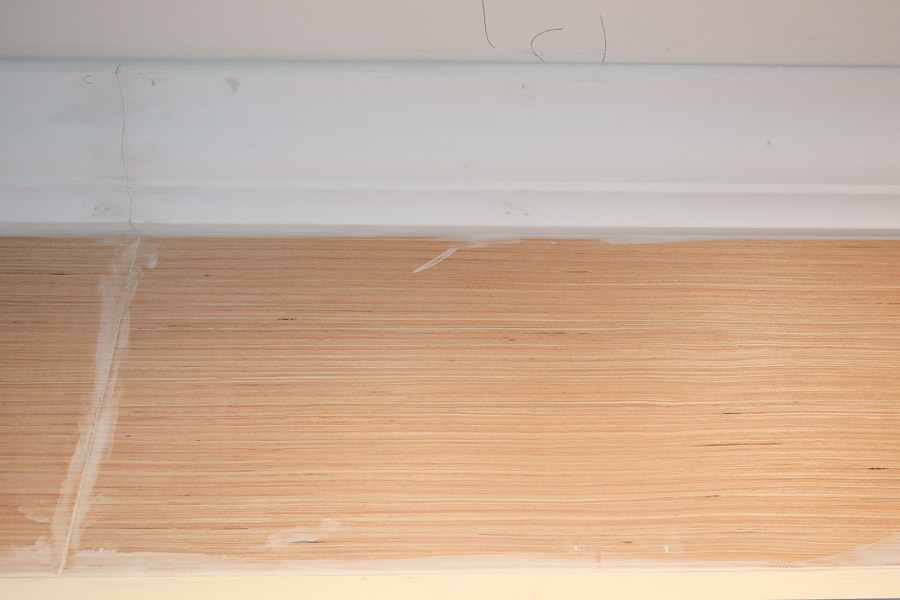
3. Add plywood to the 2×2 frame above the cabinets
Measure the distance between the ceiling and kitchen cabinets. Then, cut a piece of 1/4″ plywood to this size less a 1/4″ so you can easily move it into the space.
We actually had our plywood cut at the home improvement store. But, you can also cut it with a table saw, circular saw, or Dremel. Only one side needs to be a really good, straight cut since the other side will be covered by the crown molding.
Attach plywood to the 2x2s with 1 1/4″ brad nails.
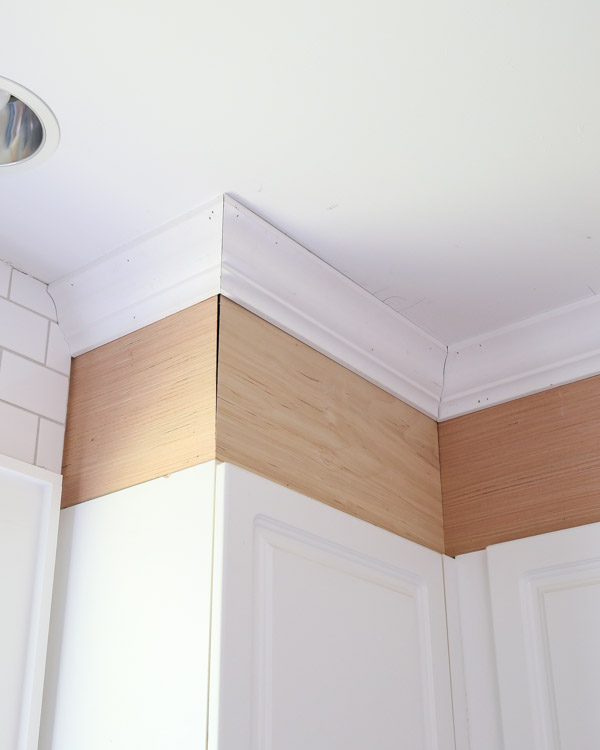
If you have cabinets that are just on one wall, this step is really easy. But, if your kitchen cabinets are like ours, where one corner cabinet is located on the adjacent wall, then two pieces of plywood will join together to create an outside corner.
You can keep this simple and just have the two edges join together next to each other. But, we wanted a cleaner corner edge and decided to add a 45 degree edge to the two ends for a clean joint. If you have a table saw this is easy to do. But, we don't so we used our router and our 45 degree chamfer router bit to add a 45 degree edge to the two board edges.

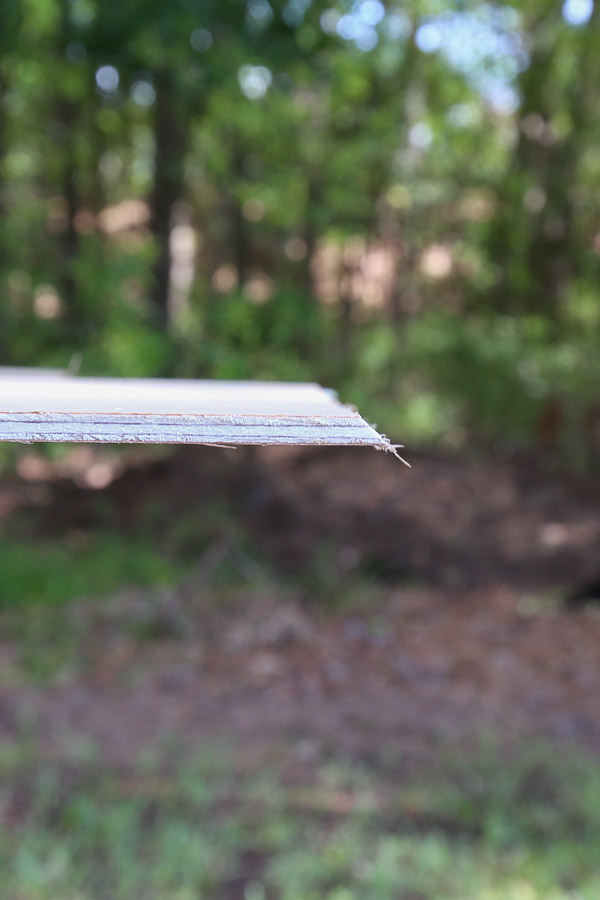
We still ended up with a small gap in the end between the boards, but it all cleaned up in the end with some good caulking! You can see a photo of this corner close up in the next step.
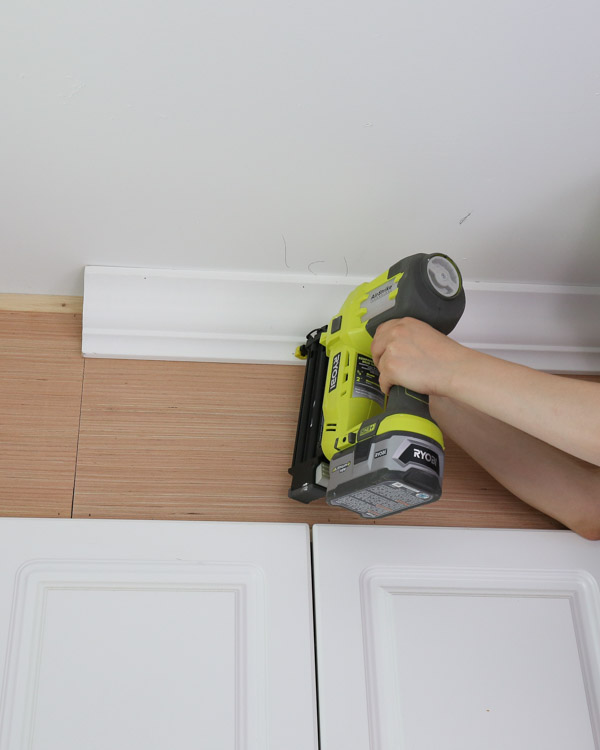
4. Add crown molding to space above the kitchen cabinets
The last step is to attach the crown molding. Use brad nails and attach it along the bottom of the molding into the 2x4s and along the ceiling into the ceiling studs.
If you just have one wall of kitchen cabinets, then adding the crown molding is really easy and you don't need any fancy angled cuts, just straight cuts from wall to wall.
But, again if your kitchen cabinets are like ours, with a corner cabinet on the adjacent wall, then an inside corner and outside corner cut is needed for the crown molding.
Inside corners are tough. Originally, I wanted to cope the inside corner cut for the cleanest and best fitting look. But, we didn't have the right tools to do that.
We used the classic, no compound, mitered cut (verticaly nested) method for both the inside and outside corner. I will have to do a separate tutorial on crown molding, but this cutting guide from Dewalt was super helpful and explains how to do it. You basically turn your crown molding upside down and cut at a 45 degree angle.
I also have a clip of doing one of the crown molding cuts in the video tutorial here.

Our outside corner turned out well. Our inside corner took some time and we had to make a few extra cuts at angles other than 45 degrees to get things to line up enough where we could caulk the imperfections.
5. Caulk, fill nail holes, and paint
Fill all nail holes with a lightweight spackle, allow it to dry, then lightly hand sand any excess if needed.
Next, caulk all gaps, seams, and corners with a paintable caulk.
After caulking, prime the boards and plywood if they aren't already pre-primed.
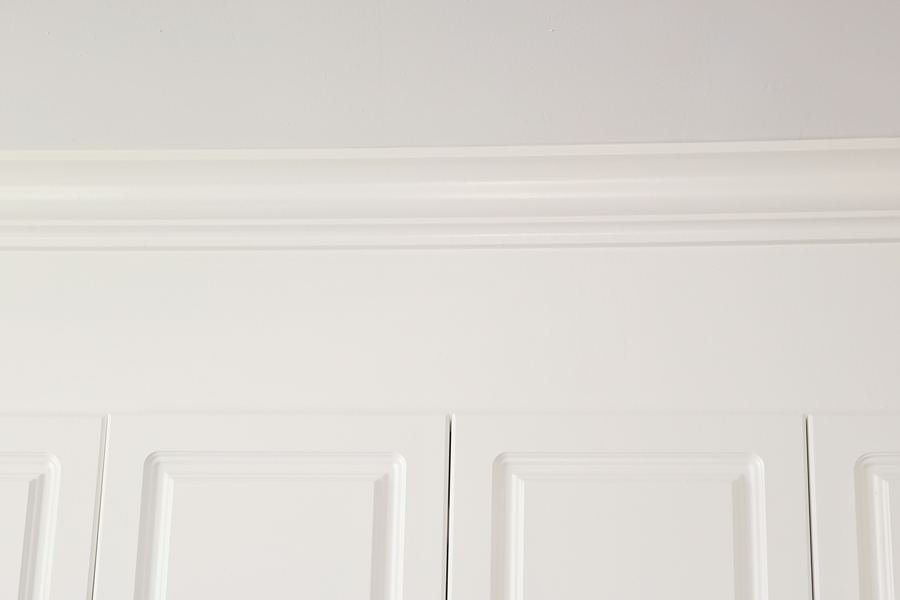
Lastly, paint the enclosure and crown molding! We used the Benjamin Moore Advance paint, in White Dove with a satin sheen. The Advance line is great for kitchen cabinets and high traffic areas, so we will be using it for our kitchen cabinets when we paint them.

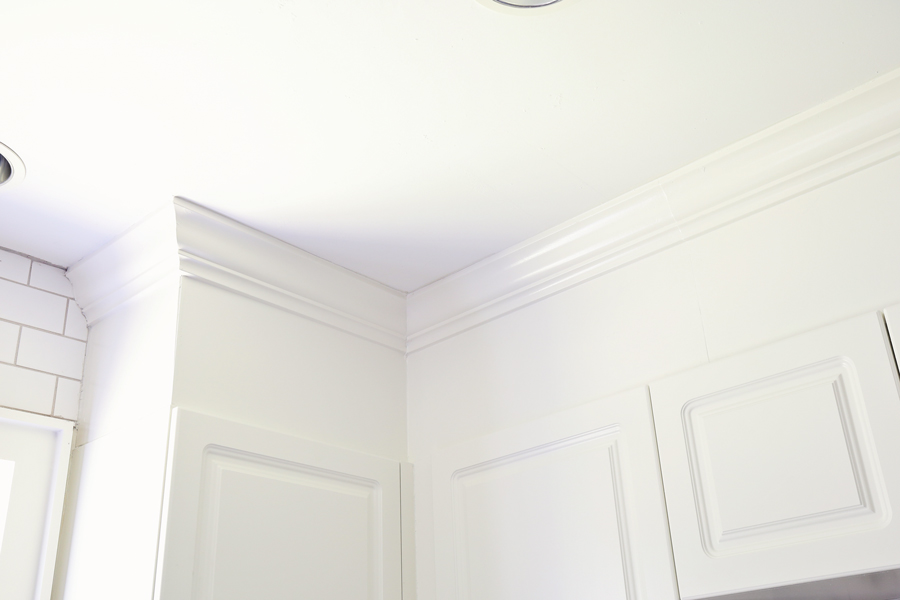
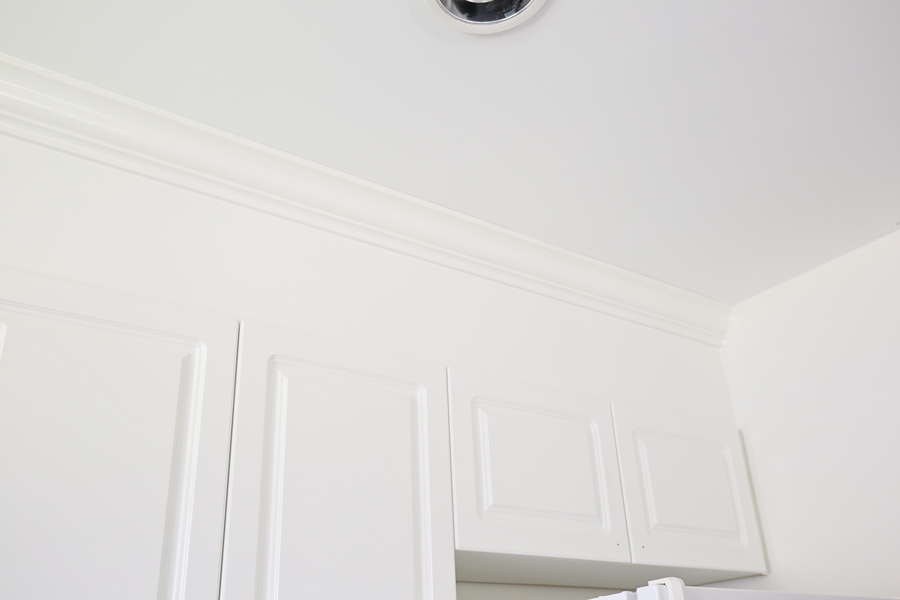
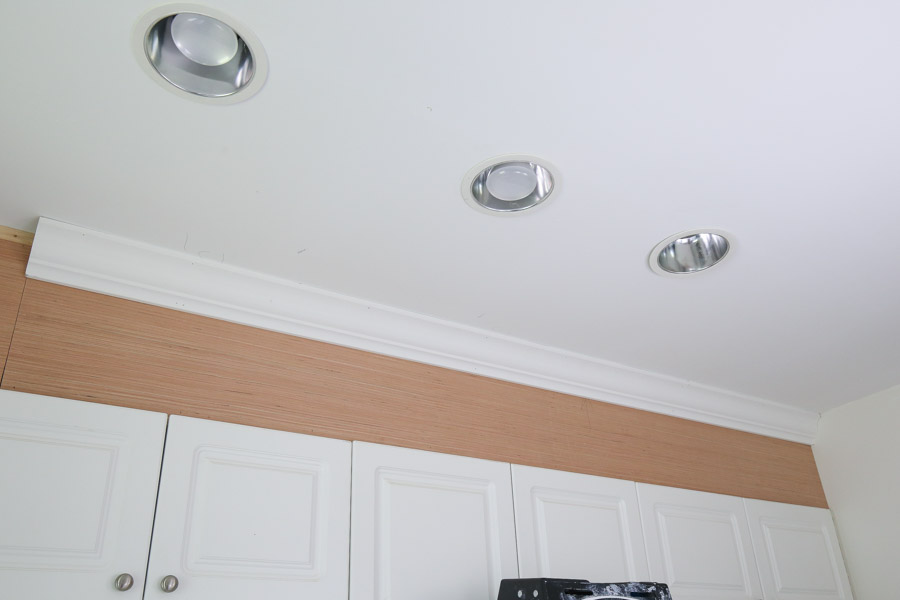
Our new extended kitchen cabinets with crown molding look great and add character to our standard kitchen. It makes the room feel taller and more airy too! It's amazing how much of a difference it makes and for less than $60, it really is a big impact for a small cost!
Well that's how to enclose space above kitchen cabinets!
Let's just compare again to another before photo :
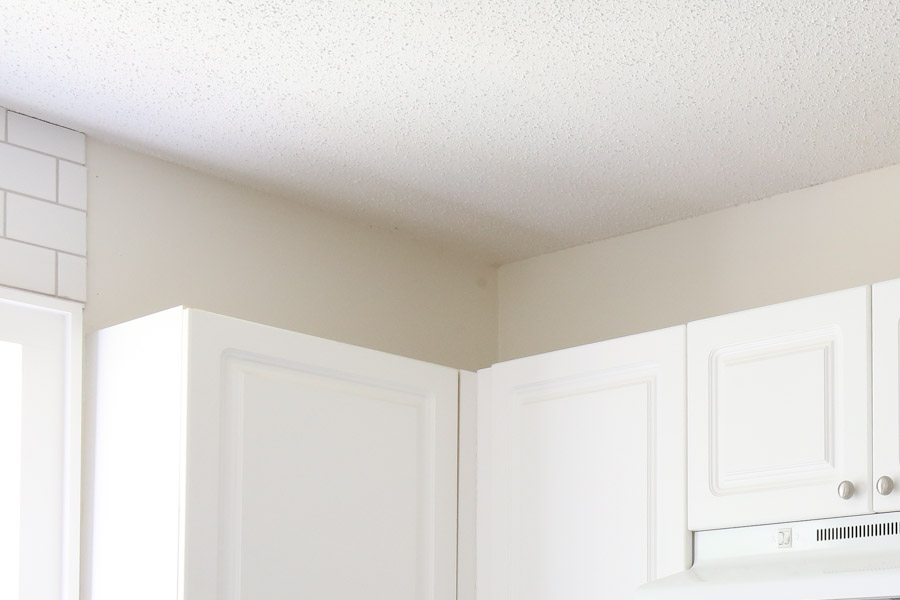
BEFORE PHOTO
And here's a close up of the finish work:
I can't wait to share our next project! Follow along on Instagram stories for sneak peeks of the kitchen makeover progress and follow along on YouTube for video tutorials of all the DIY projects!
Want to save for later?! PIN IT HERE:
How to Add Molding to Kitchen Cabinets
Source: https://angelamariemade.com/how-to-enclose-the-space-above-kitchen-cabinets/
0 Response to "How to Add Molding to Kitchen Cabinets"
Post a Comment